7 Woodworking Christmas Projects That Add Charm to Any Home
I’ve always believed that woodworking Christmas projects bring a special kind of warmth into a home—something store-bought decor just can’t replicate. There’s magic in turning raw wood into festive pieces that hold memories, not just decorations. Every cut, sand, and finish feels like adding a little personality to the holidays. In this guide, I’m sharing seven of my favorite Christmas woodworking projects that add charm, spark conversation, and make your home feel truly festive. Grab some coffee, put on holiday music, and let’s talk sawdust and cheer.
Why Woodworking Christmas Projects Feel So Special
There’s something deeply comforting about woodworking Christmas projects. They slow us down during a season that often feels rushed. I’ve noticed that handmade wooden decor carries emotional weight—it tells a story. Each nick or grain pattern becomes part of the memory. These projects aren’t just decorations; they’re traditions in the making. When guests notice and ask where you bought something, there’s a quiet pride in saying, “I made it.” That feeling alone makes woodworking during Christmas incredibly rewarding.
Getting Started With Woodworking Christmas Projects
Starting holiday builds doesn’t mean you need a full workshop or years of experience. I always tell people to start simple and build momentum. Woodworking Christmas projects should feel joyful, not stressful. Choose designs that match your skill level and your available time. Pine and scrap wood are perfect for festive builds because they’re forgiving and affordable. Think of these projects like holiday baking—simple recipes often bring the most smiles.
Choosing Beginner-Friendly Christmas Builds
Beginner-friendly Christmas projects focus on straight cuts, basic assembly, and creativity over complexity. I love projects that allow flexibility, like signs or ornaments, because small imperfections feel charming rather than wrong. Woodworking Christmas projects don’t need perfection—they need heart. When beginners succeed early, confidence grows fast. That’s how woodworking turns from “trying something new” into a holiday tradition you look forward to each year.
Setting Realistic Holiday Expectations
The holidays already come with enough pressure, so I always recommend setting realistic goals in the workshop. Not every project has to be Instagram-perfect. Woodworking during Christmas should feel like a cozy fireplace, not a deadline. Build with the mindset that handmade means unique. When expectations are realistic, woodworking Christmas projects become relaxing instead of overwhelming—and that’s exactly how they should feel.
Project #1 – Rustic Wooden Christmas Tree
A rustic wooden Christmas tree is one of my go-to woodworking Christmas projects because it checks all the right boxes—it’s beginner-friendly, endlessly customizable, and works with almost any decor style. Whether you build it from stacked boards, pallet wood, or leftover slats, this project delivers instant farmhouse charm. I especially love that no two trees ever look the same. Painted, stained, distressed, or left natural, each one feels personal and timeless. Best of all, it’s reusable year after year, turning a simple build into a lasting holiday tradition.
Basic Steps to Build a Rustic Wooden Christmas Tree
To start, I recommend laying out your wood pieces in a tree shape on the floor or workbench before cutting anything. This helps you visualize proportions and make adjustments early. Once you’re happy with the shape, cut the boards so each row gradually shortens toward the top. Sand all edges lightly to remove splinters—this step alone makes the project feel polished. Next, attach the boards to a center support or backing board using wood glue and screws or nails, working from the bottom up. Finally, add a small base or stand for stability, then finish with paint, stain, or a clear coat. The result is a charming holiday piece that looks impressive but feels surprisingly easy to build.
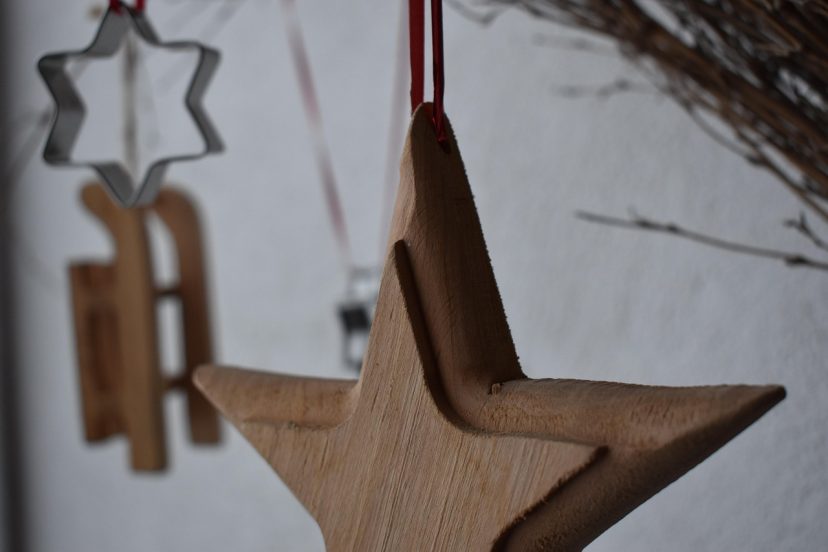
Project #2 – Handmade Wooden Ornaments
Handmade wooden ornaments are small woodworking Christmas projects with a surprisingly big impact. I love them because they’re quick to make, incredibly flexible, and perfect for those moments when creativity is high but time is short. Simple shapes like stars, snowflakes, circles, or personalized name tags work beautifully with thin wood scraps. These ornaments make thoughtful gifts because they feel intentional and heartfelt. Each one tells a small story, whether it’s hanging on a tree, tied to a present, or tucked into a stocking.
Basic Steps to Build Handmade Wooden Ornaments
I usually start by sketching or tracing simple shapes onto thin wood using stencils or templates. Once the shapes are marked, I cut them out with a scroll saw, jigsaw, or even a coping saw for smaller pieces. After cutting, I sand all edges smoothly, paying extra attention to corners so everything feels soft to the touch. Next, I drill a small hole at the top for string or ribbon. From there, finishing is where the fun really begins—paint, wood stain, wood burning, or a clear seal all work well. Once dry, add twine, ribbon, or hooks, and the ornaments are ready to display or gift.
Project #3 – Festive Wooden Candle Holders
Festive wooden candle holders are some of my favorite woodworking Christmas projects because they instantly create a cozy, welcoming atmosphere. Whether placed on a dining table, mantel, or windowsill, they add warmth without overpowering the space. I especially love how simple blocks of wood can be transformed into something elegant with just a few careful steps. The soft glow of candlelight against natural wood grain feels nostalgic and calming—perfect for the holiday season. With the right precautions, these projects are both beautiful and safe.
Basic Steps to Build Festive Wooden Candle Holders
I usually begin by cutting solid wood blocks or beams to the desired height, keeping the bases wide enough for stability. After marking the center point, I drill a hole sized specifically for tea lights, taper candles, or metal inserts—accuracy here is key. Once the holes are drilled, I sand all surfaces thoroughly, rounding edges slightly for a softer look. From there, finishing is where personality shines. A light stain highlights the grain, while paint or whitewash creates a festive feel. I always recommend using LED candles or metal inserts for real flames. The final result is a simple yet charming holiday accent that feels handcrafted and intentional.
Project #4 – Holiday Entryway Sign
Holiday entryway signs are one of those woodworking Christmas projects that instantly set the tone for the season. I love how a simple sign can make guests feel welcome before they even step inside. Phrases like “Merry & Bright,” “Home for the Holidays,” or even a family name add charm and personality. This project is especially fun because it blends woodworking with creativity—typography, color choices, and distressing techniques all get a moment to shine. Best of all, signs don’t require advanced joinery, which makes them perfect for DIY lovers of any skill level.
Basic Steps to Build a Holiday Entryway Sign
I usually start by cutting a flat wooden board to the desired size, keeping the proportions balanced for the space where it will hang or lean. After sanding the surface smooth, I decide on the wording and layout, either sketching it lightly in pencil or using vinyl stencils. Once the design is in place, I paint or stain the background, letting it dry completely before adding lettering. Distressing the edges with sandpaper gives the sign a cozy, rustic feel. Finally, I seal the piece and add hanging hardware or a simple stand. The finished sign feels personal, festive, and welcoming—exactly what a holiday entryway should be.
Project #5 – Cozy Wooden Advent Calendar
A cozy wooden advent calendar is one of those woodworking Christmas projects that instantly becomes a family tradition. It’s a bit more involved than other holiday builds, but every minute spent on it feels worthwhile. Whether you choose small drawers, hooks with hanging pouches, or numbered pockets, this project blends craftsmanship with daily anticipation. Get a few calendar ideas here. I’ve seen kids get more excited about opening the advent calendar than decorating the tree itself. Build it once, and it becomes a treasured part of your holiday season year after year.
Basic Steps to Build a Cozy Wooden Advent Calendar
I like to begin by deciding on the layout—drawers, hooks, or small boxes—and sketching the overall design on paper first. Once the plan feels right, I cut a backing board that will support the entire calendar and mark out where each compartment will go. After building or attaching the drawers, hooks, or pockets, I sand everything carefully to keep edges smooth and kid-friendly. Numbering each section comes next, using paint, stencils, or wood-burning for a personal touch. Finally, I finish the piece with paint or a clear seal and add wall-mounting hardware. The result is a charming calendar that feels both festive and meaningful.
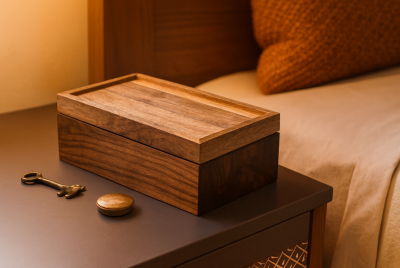
Turn Leftover Wood Into Gifts
One of my favorite things about woodworking Christmas projects is using leftover wood to create meaningful gifts. Scraps don’t have to mean “cheap”—they often become the most thoughtful pieces. Small boxes, coasters, ornaments, and mini signs come together quickly and reduce waste. It’s like turning crumbs into cookies. Check out these easy scrap wood projects. This approach saves money, clears your shop, and adds an Eco-friendly touch to your holiday gifting.
Scrap Wood Ideas That Still Look Thoughtful
Scrap wood projects shine when they’re intentional. Sand edges smooth, add a nice finish, and suddenly scraps feel designed. I often pair scrap builds with twine, greenery, or simple tags. Here is a video with ideas for scrap wood. These woodworking Christmas projects prove that size doesn’t define value. Thoughtfulness does. Handmade always carries more meaning than something pulled off a shelf at the last minute.
Project #6 – Wooden Stocking Holders
Wooden stocking holders are one of my favorite woodworking Christmas projects because they combine beauty and function in such a simple package. They’re sturdier than most store-bought hooks, safer for kids, and add a personal touch to any mantel or shelf. I like making designs with weighted bases and hooks or carved notches to hold stockings securely. The best part? They can be customized with names, family initials, or carved holiday motifs. Honestly, they’re one of those builds people don’t realize they need—until they see yours in action.
Basic Steps to Build Wooden Stocking Holders
I usually start by selecting a sturdy block of wood for the base, something wide enough to prevent tipping. After cutting it to size, I sand all edges smooth and round corners slightly for a polished look. Next, I decide whether to use metal hooks or carve notches directly into the wood for holding stockings. If using hooks, I drill pilot holes and attach them securely with screws; if carving notches, I mark their placement carefully and cut with a chisel or small saw. Once the holding mechanism is in place, I finish the piece with stain, paint, or a clear coat, and add personalization like names or designs. The final product is functional, decorative, and something your family will use every year.
Project #7 – Decorative Wooden Centerpieces
Decorative wooden centerpieces are one of my favorite woodworking Christmas projects because they instantly create a natural focal point for holiday tables. Whether you build a tray, a box, or a sculptural piece, wood adds warmth and character that store-bought decor just can’t match. I often like to mix my wooden pieces with candles, pine cones, greenery, or small ornaments. The contrast of natural wood with festive accents feels cozy, grounded, and undeniably charming. The best part? A well-made centerpiece transitions beautifully beyond Christmas, giving you a stylish decor piece all year long.
Basic Steps to Build Decorative Wooden Centerpieces
I usually start by deciding the type of centerpiece I want—tray, box, or sculptural form—and selecting a suitable piece of wood or several scraps to assemble. After cutting the wood to size, I sand all surfaces and edges so they’re smooth to the touch. Next, I assemble the base using wood glue and small nails or screws, depending on the design. If creating a box or tray, adding small supports or dividers can help organize decorative elements. Once assembled, I stain, paint, or seal the wood to highlight its grain. Finally, I arrange candles, pine cones, greenery, or ornaments on top. The result is a centerpiece that’s both festive and functional, perfect for entertaining or gifting to loved ones.
Choosing the Right Wood for Christmas Projects
Wood choice matters more than people think. Pine is my top pick for woodworking Christmas projects because it’s affordable and forgiving. Hardwoods look beautiful but require more patience. Matching wood type to project keeps frustration low and enjoyment high. Think of wood like fabric—some materials suit certain designs better. Choosing wisely saves time and sanity during the busy holiday season.
Finishing Touches That Add Holiday Charm
Finishing transforms woodworking from “nice” to “wow.” Light stains, whitewash, or clear coats enhance grain without overpowering it. I always remind people not to rush this step. Woodworking Christmas projects deserve patience here. Add subtle distressing or metallic accents for festive flair. Finishing is like wrapping a gift—the presentation matters just as much as what’s inside.
Common Mistakes to Avoid With Christmas Builds
The biggest mistake I see is over-complicating projects. Keep designs simple and timelines realistic. Rushing leads to frustration, and frustration kills creativity. Woodworking Christmas projects should feel joyful, not like another obligation. Measure carefully, dry-fit pieces, and embrace imperfections. Handmade charm comes from personality, not precision.
Conclusion
Woodworking Christmas projects add more than decoration—they add heart to the holidays. From rustic trees to scrap wood gifts, these builds create memories that last far beyond December. I truly believe handmade pieces make homes feel warmer and celebrations more meaningful. Whether you build one project or all seven, the joy is in the process. So grab your tools, turn on some holiday music, and make something unforgettable this season.
FAQs
1. Are woodworking Christmas projects beginner-friendly?
Yes, many projects use simple cuts and basic tools, making them perfect for beginners.
2. What wood works best for Christmas projects?
Pine is affordable, easy to work with, and ideal for festive builds.
3. Can woodworking Christmas projects be gifts?
Absolutely. Handmade wooden gifts are thoughtful and deeply appreciated.
4. How long do most Christmas projects take?
Many can be completed in a weekend or even an afternoon.
5. Are these projects good for selling at craft fairs?
Yes! They are fast to build, easy to customize and very popular with buyers.