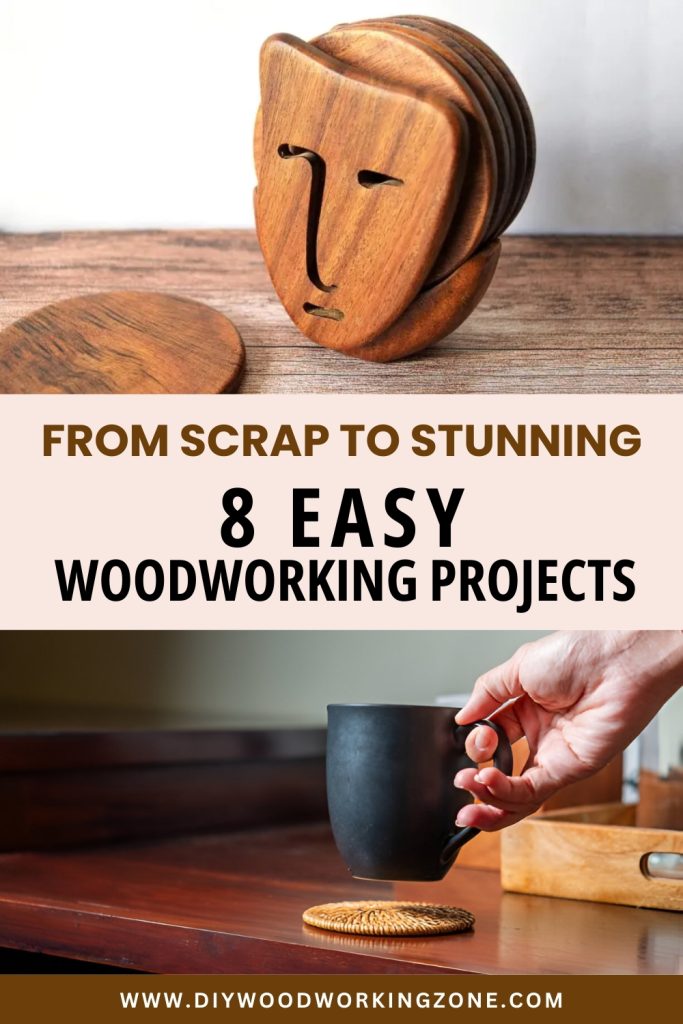
From Scrap to Stunning: 8 Easy Woodworking Projects

Introduction – Why Scrap Wood is a Hidden Treasure
Have you ever looked at that pile of scrap wood in your garage and thought, “What can I do with this?” Well, you’re in for a treat! Scrap wood isn’t just leftover junk—it’s a goldmine for creativity. With a little effort, you can turn those forgotten pieces into stunning, functional decor. Today, I’m going to share eight easy woodworking projects that are perfect for beginners. Let’s get started!
Why Choose Easy Woodworking Projects?
The Joy of DIY Creations
There’s something truly magical about making something with your own hands. It’s like being a modern-day wizard, but instead of a wand, you’ve got a saw and some wood glue. The moment you step back and admire your finished piece, there’s this wave of satisfaction that washes over you. You built that! Whether it’s a tiny coaster or a full-blown shelf, the pride of saying, “I made this,” is priceless. Plus, woodworking is a fantastic way to unwind. Forget the stress of the day—once you start cutting, sanding, and assembling, all that tension just melts away. It’s like therapy, but instead of talking about your feelings, you’re creating something beautiful.
Budget-Friendly and Eco-Conscious
Who says you need to spend a fortune to decorate your home? Woodworking is one of the most budget-friendly hobbies out there, especially when you’re working with scrap wood. Instead of tossing those extra planks or old wooden furniture, why not repurpose them into something new? It’s like giving old wood a second chance at life. Plus, it’s an eco-friendly way to create—no need to contribute to landfills when you can upcycle! Using scrap wood isn’t just about saving money; it’s about making the most of what you already have. It’s a win-win—you get to flex your creativity while also being kind to the planet.
Essential Tools and Materials for Beginners
Basic Tools for Woodworking
You don’t need a fancy workshop or a collection of high-end tools to start woodworking. In fact, with just a handful of essentials, you can tackle most easy woodworking projects with ease.
Before diving in, you’ll need a few essential tools:
- A handsaw or jigsaw – A reliable handsaw (or jigsaw if you want to get fancy)
- Sandpaper or an electric sander (It’ll save your arms a workout)
- A drill and screws
- Wood glue – another must-have because, let’s be honest, sometimes screws just don’t cut it
- Measuring tape and pencil – those are the real MVPs
These basics will help you complete most projects with ease! The best part? Most of these tools are affordable and last for years. So, before you know it, you’ll have everything you need to bring your ideas to life.
Choosing the Right Wood Scraps
Not all wood scraps are created equal! Some are like hidden treasures, while others… well, they belong in the fire pit. If you want your projects to last, choose wood that’s dry, sturdy, and free of cracks or mold. Avoid anything treated with harsh chemicals, especially if you’re making something for indoor use. Pine is a great choice for beginners because it’s easy to cut and sand, while hardwoods like oak add a more polished touch. And don’t forget—reclaimed wood from old furniture can be a goldmine! A little sanding and a fresh coat of stain can make even the roughest scraps look brand new.
8 Easy Woodworking Projects You Can Try Today
1) Rustic Wooden Coasters
Simple and Functional Design
Sometimes, the best projects are the simplest ones. Take wooden coasters, for example. They might not seem like a big deal, but they serve a practical purpose and add a rustic touch to any space. Plus, they’re the perfect starter project for anyone just dipping their toes into woodworking. No complicated cuts, no fancy joinery—just a few pieces of wood, some sanding, and a little creativity. And the best part? You can personalize them however you want! Whether you prefer a natural wood finish, a splash of paint, or even some wood-burning designs, coasters are a blank canvas waiting for your artistic touch.
How to Make It
Making wooden coasters is as easy as pie—actually, probably easier since you don’t have to worry about the crust.
- Cut wood into 4×4-inch squares or circles, depending on the look you want.
- Sand the edges for a smooth finish. If you want a more natural feel, leave the edges raw for a live-edge effect. Sand them down to make sure they’re smooth (because no one likes a splinter in their hand while reaching for a drink).
- Apply wood stain or leave them natural for a rustic look. Or paint them to match your decor.
- Add a protective sealant to make them water-resistant.
Boom—you’ve got yourself a set of handmade coasters that look straight out of a high-end home store. You’ve just made your first DIY easy woodworking project!
2) Scrap Wood Wall Art
Let Your Creativity Flow
Wood scraps are like puzzle pieces—you can arrange them in countless ways to create something unique. One of the best ways to make use of different-sized scraps is by turning them into wall art. No two pieces have to match, and that’s the beauty of it! Whether you go for a geometric design, a rustic patchwork look, or a sleek modern pattern, it’s entirely up to you. The best part? There’s no right or wrong way to do it. It’s all about having fun, experimenting, and letting your personality shine through.
Step-by-Step Guide
Creating your own wooden wall art is simpler than you think.
- First, gather your scrap wood and arrange the pieces into a design or pattern that speaks to you.
- Once you’re happy with the layout, attach them to a plywood backing using nails or wood glue.
- Sand everything down for a smooth finish, then stain or paint to match your style.
- If you want to add some extra flair, consider distressing the wood or adding a touch of gold leaf.
- Once it’s dry, hang it up and admire your masterpiece—you’ve just created a one-of-a-kind decor piece for next to nothing!
3) DIY Wooden Candle Holders
Adding Warmth to Any Space
There’s nothing quite like the soft glow of candlelight to make a room feel cozy. But let’s be honest—store-bought candle holders can be ridiculously overpriced. Why not make your own instead? Wooden candle holders add a rustic, handmade touch to any space, and they’re incredibly easy to create. Whether you’re going for a farmhouse look or a sleek minimalist design, a few pieces of scrap wood and some simple tools are all you need to bring warmth and charm into your home.
How to Craft Yours
- Start with a small solid wood block, preferably something thick enough to hold a candle securely.
- Measure and mark the center, then use a drill bit or hole saw to carve out space for the candle.
- Smooth the edges with sandpaper, then stain or paint it to match your decor.
- For an extra cozy touch, consider wrapping some twine around the base or adding carved details.
- Once it’s dry, pop in a candle, light it up, and enjoy the warm, inviting ambiance you just created with your own two hands.
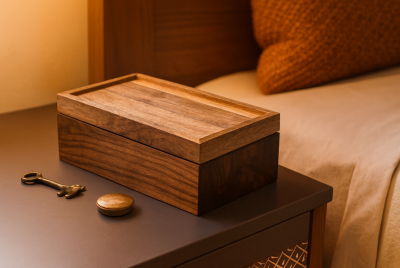
4) Simple Wooden Organizer
A Practical and Stylish Addition
Who doesn’t love a project that’s both functional and stylish? That’s the beauty of woodworking—you’re not just making something pretty, you’re creating something useful. Take a simple wooden organizer, for example. It keeps your space tidy while adding a rustic, handcrafted charm. Whether it’s for your entryway, office, or kitchen, having a designated spot for your essentials makes life so much easier. Plus, there’s something satisfying about using something you made every single day. It’s like giving your space a personal touch that store-bought items just can’t match.
Quick Assembly Steps
Building a wooden organizer is way easier than you might think!
- Start by cutting your wood to size based on what you need—maybe a few compartments for mail, a slot for pens, or even a drawer for keys.
- Once your pieces are ready, sand them down to smooth any rough edges (trust me, your hands will thank you later).
- Use wood glue and nails to secure everything together, making sure it’s sturdy.
- If you want a polished look, stain or paint it before sealing it with a protective coat.
Before you know it, you’ll have a stylish, functional piece that helps keep your space clutter-free.
5) Handmade Wooden Planters
Bringing Nature Indoors
There’s something special about adding a bit of nature to your home. It brings warmth, freshness, and a sense of calm that’s hard to replicate with anything else. And what better way to do that than with a DIY wooden planter? Whether you live in a house with a big backyard or a small apartment with limited space, a handcrafted planter lets you bring greenery indoors in a way that feels personal. Plus, it’s a fun, easy woodworking project that can be customized to fit your style—rustic, modern, or somewhere in between!
Step-by-Step Guide
- First things first—choose the size and shape of your planter. Do you want a cute little tabletop box or a larger windowsill herb garden?
- Once you’ve decided, cut your wood pieces or slats to fit your design.
- Sand them down to get rid of splinters.
- Then assemble the box using nails or screws into a small box.
- Don’t forget to drill a few drainage holes in the bottom—your plants will thank you!
- Finish it off with a stain, paint, or even a fun design using stencils.
Fill it with soil, add your favorite plants, and enjoy the fresh, natural vibe it brings to your space.
6) Simple Phone Stand
A Handy Addition to Any Desk
Ever find yourself fumbling to prop up your phone while following a recipe, watching a video, or taking a hands-free call? A DIY wooden phone stand is the perfect solution, and the best part—it’s one of the easiest woodworking projects you can tackle! Not only does it keep your phone upright and accessible, but it also adds a sleek, handmade touch to your desk, kitchen counter, or nightstand. Plus, making one yourself means you can customize it to fit your style. Whether you want a rustic, natural wood look or something colorful and modern, this project lets you get creative while keeping things super functional.
How to Build It
Making your own phone stand is as easy as it gets!
- Start with a small wooden block—something sturdy like oak or pine works great.
- First, cut it at a slight angle so your phone leans back just enough to be easy to view.
- Then, use a chisel or saw to create a small groove where your phone will rest. This keeps it stable and prevents slipping.
- Once your basic shape is done, sand everything down to remove rough edges and give it a smooth, polished feel.
- Finally, add a personal touch by staining, painting, or even engraving your initials into the wood.
A little bit of effort, and you’ll have a stylish, functional phone stand that makes everyday life just a bit easier!
7) Key Holder with Hooks
Never Lose Your Keys Again
How many times have you been late because you couldn’t find your keys? It’s frustrating, right? That’s why a DIY wooden key holder is a game-changer. Instead of frantically searching the house every morning, you’ll always know exactly where your keys are. Plus, a handcrafted key holder isn’t just practical—it’s a stylish addition to your entryway. You can keep it simple with a sleek wooden board and hooks, or get creative with a rustic, reclaimed wood design. Either way, you’ll never have to dig through couch cushions for your keys again.
Easy Assembly Instructions
Making a key holder is one of the easiest woodworking projects out there!
- Start by choosing a piece of wood that fits your space—something small and simple or a larger piece with extra storage.
- Sand it down to remove rough edges, then attach hooks for your keys.
- If you want, you can add a small shelf for mail or a spot to hold sunglasses.
- Stain or paint it to match your decor, then mount it near your door.
That’s it! A quick, easy project that saves you time and stress every single day.
8) Wooden Picture Frames
Displaying Memories in Style
There’s something special about framing your favorite photos in a handmade wooden frame. It adds a personal touch that store-bought frames just don’t have. Whether you want a sleek modern look or a more rustic, distressed style, building your own frame lets you showcase your memories in a way that feels uniquely yours. Plus, it’s a great beginner-friendly woodworking project that doesn’t require a ton of tools or materials. A little effort, some creativity, and you’ve got a custom frame that makes your cherished moments even more special.
Simple DIY Steps
- Start by measuring and cutting your wood pieces to fit the size of your photo.
- Mitered corners create a polished look, but if that feels intimidating, straight cuts work just fine.
- Sand everything down to remove rough spots.
- Then glue and nail the pieces together to form the frame.
- Once it’s sturdy, stain or paint it to match your decor.
- Add a backing and a way to hang it, then pop in your photo.
And just like that, you’ve got a handmade frame that turns your favorite memories into a stunning display piece.
Tips for Making Your Easy Woodworking Projects Stand Out
Sanding and Finishing Techniques
Sanding might not be the most exciting part of woodworking, but it’s one of the most important. A well-sanded piece not only looks better but also feels smoother and lasts longer. Start with a rough grit sandpaper to remove splinters and imperfections, then work your way up to a finer grit for a silky finish. Always sand in the direction of the wood grain—it makes a huge difference in the final look. And don’t rush it! Taking the time to sand properly will make your project look professional, even if you’re a beginner.
Staining and Painting Ideas
Choosing between stain and paint depends on the look you’re going for. If you love the natural beauty of wood grain, a stain is your best bet. It enhances the wood’s natural patterns and gives it a rich, warm tone. But if you want something bold and colorful, paint is the way to go. You can even get creative with distressing techniques or two-tone finishes for a unique touch. No matter what you choose, always seal your project with a clear protective coat to keep it looking great for years to come.
For more tips watch this great video!
Common Mistakes Beginners Should Avoid
Skipping Measurements
Eyeballing might work for some things, but in woodworking, it’s a recipe for disaster. A slight miscalculation can throw off your entire project, leaving you with uneven pieces that just don’t fit together. That’s why measuring is so important. Always use a measuring tape and mark your cuts clearly before picking up a saw. And if precision is crucial, consider using a square or a ruler to double-check your lines. Trust me, taking a few extra minutes to measure properly will save you a lot of frustration down the road.
Not Using the Right Tools
Using the wrong tools can turn a fun project into a nightmare. Ever tried making a precise cut with a dull saw? It’s not fun. The right tools make all the difference—not just for the quality of your project but for your safety too. Invest in a good saw, a reliable drill, and quality sandpaper. And don’t forget about clamps! They might not seem important, but they make assembling pieces so much easier. A little preparation goes a long way, and having the right tools on hand will make your woodworking experience smoother and more enjoyable.
Conclusion
Woodworking isn’t just about cutting and sanding—it’s about bringing ideas to life with your own two hands. There’s something downright magical about turning a simple piece of wood into something useful and beautiful. And guess what? You don’t have to be a master carpenter to dive in! With easy woodworking projects, you can create coasters, shelves, or even wall art without breaking a sweat. Plus, there’s no greater feeling than seeing something you made being used and admired in your home. So, don’t let those scrap wood pieces go to waste—grab your tools, get creative, and start turning those forgotten leftovers into stunning, functional works of art. You’ve totally got this!
FAQs
- What is the best wood for beginners?
Softwoods like pine and cedar are great for beginner projects. - How can I find free scrap wood?
Check construction sites, local lumberyards, or even old furniture! - Do I need expensive tools for woodworking?
No! Basic tools like a saw, drill, and sandpaper are enough to start. - Can I sell my woodworking projects?
Absolutely! Handmade wooden items are always in demand. - How do I protect my wood projects from moisture?
Use a sealant or waterproof finish to keep your wood looking fresh.
Want to build something new? Check out these beginner projects.