How to Use a Wood Burning Tool: Easy Tips for Beautiful Designs
Introduction: Welcome to the Art of Wood Burning
There’s something magical about transforming a simple piece of wood into an intricate piece of art using just a heated tool. If you’ve ever wanted to dive into the world of pyrography (a fancy term for wood burning), you’re in the right place! In this guide, I’ll walk you through the basics of using a wood burning tool, share some handy tips, and help you create beautiful designs with ease. Let’s get started!
Getting Started with Your Wood Burning Kit
What is a Wood Burning Tool?
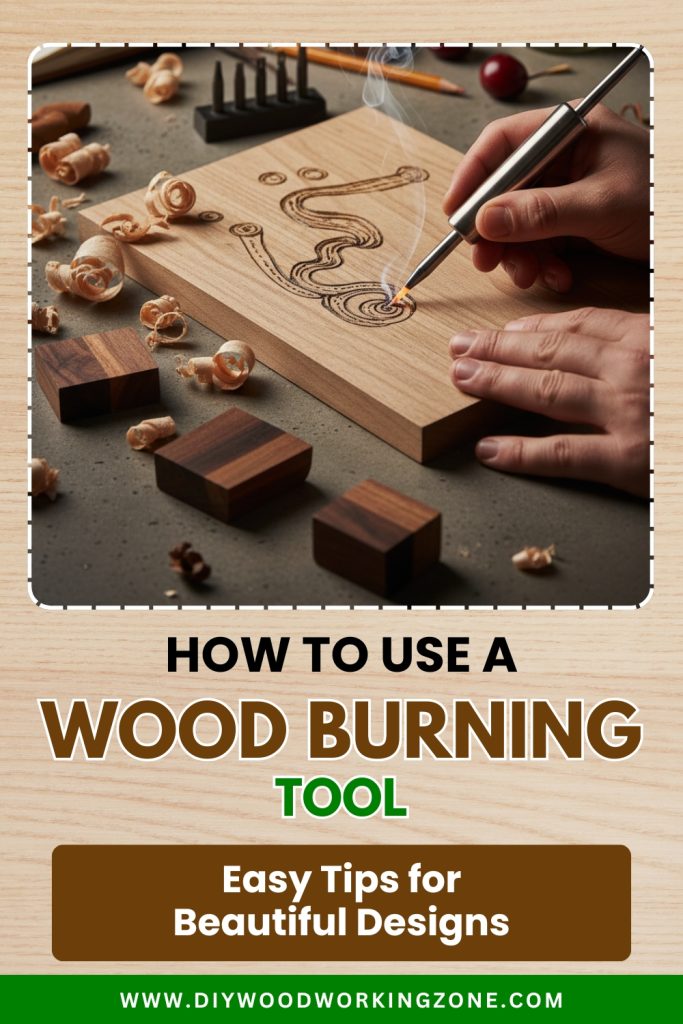
Imagine holding a magic wand that lets you transform a plain piece of wood into a beautiful, personalized masterpiece. That’s basically what a wood burning tool does! It’s a heated pen-like device that allows you to burn designs onto wood, creating anything from intricate patterns to detailed lettering. The tool works by applying controlled heat to the surface, leaving behind darkened impressions that bring your design to life. Whether you’re a beginner experimenting with simple shapes or an experienced artist crafting detailed portraits, a woodworking burning kit gives you everything you need to explore the art of pyrography. And the best part? It’s super satisfying to watch your designs literally burn into the wood, giving your creations a rustic, handcrafted feel.
Essential Supplies for Wood Burning
Before you dive into your first project, let’s make sure you have all the right tools at your fingertips. A woodworking burning kit is the heart of your setup, but you’ll need a few extras to make the process smooth and enjoyable.
- A selection of wood pieces (more on that in the next section) – First, grab some wood that’s suitable for burning (more on that in a minute).
- A heat-resistant work surface – You’ll also need a heat-resistant surface to work on, because—trust me—you don’t want burn marks on your kitchen table!
- Safety gear, such as finger guards and gloves – Safety gear is just as important, so consider heat-resistant gloves and a finger guard to keep yourself safe.
- Sandpaper for smoothing wood surfaces – Sandpaper is another must-have to smooth out the wood before burning, ensuring crisp and clean lines.
- A pencil or transfer paper for sketching designs – And don’t forget a pencil or transfer paper to sketch out your design before committing it to wood.
Once you’ve gathered these essentials, you’re ready to bring your artistic visions to life!
Choosing the Right Wood for Pyrography
Best Types of Wood for Wood Burning
Not all wood is created equal, and when it comes to pyrography, choosing the right type makes a world of difference. If you want smooth, effortless burns, go for softwoods with minimal grain.
- Basswood is a favorite among wood burning enthusiasts because of its light color and smooth texture, making it perfect for detailed designs.
- Birch is another great option since it burns evenly and holds detail well.
- If you’re looking for an affordable choice, pine is widely available, though its resin can sometimes make burning a bit tricky.
Avoid hardwoods like oak or mahogany unless you’re experienced, as their dense nature requires more heat and patience. Whatever wood you choose, make sure it’s untreated—chemically treated wood can release toxic fumes when burned. With the right wood in hand, you’ll set yourself up for stunning, high-quality designs!
Prepping Your Wood for the Best Results
Think of prepping your wood like setting up a blank canvas for painting—it’s an essential step that affects the final outcome. Start by sanding the surface with fine-grit sandpaper to remove any rough spots or imperfections. This makes it easier for your wood burning tool to glide smoothly and create clean, crisp lines. Once you’ve sanded it down, wipe off the dust with a damp cloth or a tack cloth to ensure nothing interferes with the burn. If you’re working with a lighter wood like basswood or birch, you’re all set! But if your wood is darker or uneven in tone, consider sketching out your design first with a pencil or using transfer paper. Taking a few extra minutes to prep your wood will make the burning process so much easier and give you professional-looking results.
Understanding Your Wood Burning Tool
Types of Wood Burning Tips and Their Uses
Your woodworking burning kit likely comes with multiple interchangeable tips or nibs, each designed to create different effects. Knowing which tip to use is like picking the right brush for a painting—it makes all the difference in your final piece!
- Fine tips are your best friends for detailed line work, allowing you to write words or outline intricate designs with precision.
- Shading tips are perfect for creating depth and dimension, giving your artwork a more realistic touch.
- If you love calligraphy, the calligraphy tip will help you achieve smooth, flowing letters with ease.
- There are also stamping tips, which let you press designs into the wood for a more uniform look.
Check out this short video about different tips and how to use them. Experimenting with different tips is part of the fun, so don’t be afraid to switch them out and see what effects you can create!
How to Adjust the Temperature for Different Effects
If there’s one thing that can make or break your wood burning project, it’s the temperature setting. Too hot, and you’ll scorch the wood with deep, unintended burns. Too low, and your design might come out faint and inconsistent. The trick is to adjust the heat based on what effect you’re going for. Low temperatures are great for light shading and delicate details, while higher settings are ideal for bold, dark lines. Some woodworking burning kits come with adjustable temperature dials, making it easy to switch between settings. If yours doesn’t, you can control the effect by adjusting the pressure you apply—lighter pressure for subtle burns, firmer pressure for deeper ones. Always test the heat on a scrap piece of wood before starting your actual project to get a feel for the right setting!
Mastering Basic Wood Burning Techniques
How to Hold and Control the Tool
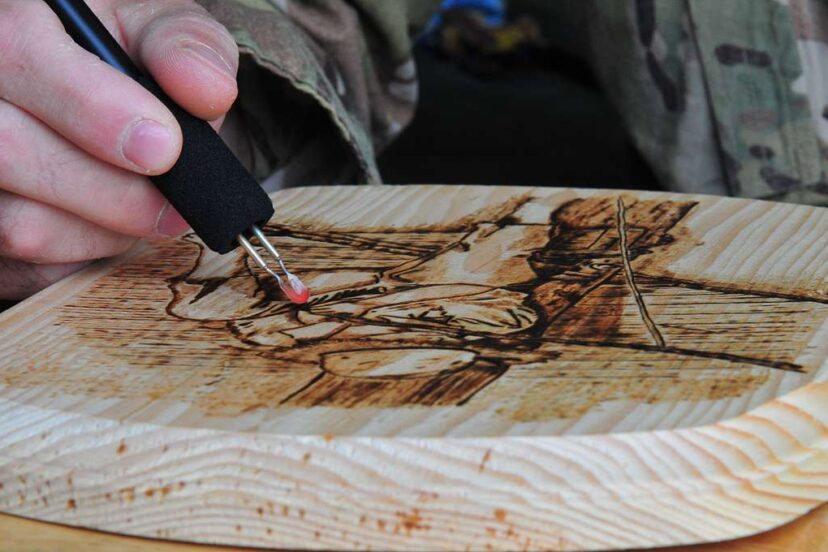
Holding a wood burning tool is a lot like holding a pen—except this pen gets really, really hot! The key to good control is keeping a relaxed but firm grip, allowing the tool to glide naturally across the wood. If you hold it too tightly, your hand might cramp up, making it harder to create smooth, steady lines. Too loose, and you’ll lose precision. Move the tool slowly and intentionally, letting the heat do the work rather than forcing it onto the wood. A good rule of thumb is to always burn in the direction of the wood grain, as this helps avoid unwanted jagged edges. With a little practice, you’ll develop muscle memory, and controlling your wood burning tool will start to feel as natural as doodling on paper.
Creating Clean Lines and Shading Effects
One of the biggest challenges for beginners is getting those crisp, clean lines without any wobbles or uneven burns. The trick? Take your time and move steadily. Quick movements often lead to uneven burns, while slow, consistent strokes give you better control. If you want to add shading, try using a circular motion instead of dragging the tip in a straight line. This creates a soft, blended effect rather than harsh, dark patches. Another shading technique is layering—burn lightly at first, then go over the area again for a deeper tone. Just like with pencil shading, the more layers you add, the richer the depth. With a little patience and practice, you’ll be able to create stunning artwork!
Designing Your Wood Burning Project
Transferring Designs to Wood
Not confident in freehand drawing? No worries! Transferring a design to your wood is an easy way to get started without stressing over perfect proportions. One of the simplest methods is using graphite transfer paper—just place it between your design and the wood, trace over it with a pencil, and voilà! The image is now on your wood, ready to be burned. If you don’t have transfer paper, another option is the “pencil shading method.” Simply print out your design, rub a pencil over the back of the paper, place it on the wood, and trace over the lines. The pressure from your pencil will transfer the design onto the surface. Check out this site about three methods to transfer your patterns. However you do it, having a guide to follow makes using your woodworking burning kit much easier and helps you achieve professional-looking results.
Freehand vs. Stencil Work
When it comes to designing your wood burning project, should you freehand it or use stencils? Well, that depends on your style and comfort level! Freehand burning gives your work a more personal, artistic touch. It allows for creativity, spontaneity, and one-of-a-kind designs. But if precision is what you’re after, stencils are a fantastic option. They help keep your lettering even and your patterns symmetrical, making them especially useful for beginners. Some kits even come with ready-made stencils to help you get started. The good news? There’s no wrong choice! You can mix both techniques—use stencils for the foundation and then freehand to add extra details. However you choose to work, the key is to have fun and let your creativity shine.
Wood Burning Safety Tips
Essential Safety Measures
Let’s be real—working with a hot tool that literally burns wood means safety should be a top priority. The last thing you want is to end up with burns on your fingers or accidentally set off the smoke alarm! First, always work in a well-ventilated area because burning wood releases fumes, and you don’t want to breathe that in for hours. If you’re working on a big project, consider wearing a mask. Heat-resistant gloves are also a smart investment since your burning tool gets hot—really hot! Make sure you place the tool on a heat-resistant surface when not in use, and never leave it plugged in unattended. It’s also a good idea to keep a small fire extinguisher nearby, just in case. With these precautions in place, you can focus on creating beautiful designs without worry!
Preventing Common Mistakes
We’ve all been there—starting a project, getting super excited, and then realizing halfway through that something’s gone wrong. One of the biggest mistakes beginners make with a burning tool is rushing. Slow down and let the heat do the work. If you press too hard, you might burn too deep or create uneven lines. Another common issue? Using the wrong type of wood. Some woods have high resin content, which can make burning unpredictable and messy. Always choose smooth, untreated wood for the best results. Sketching out your design first can also save you from regret later. And here’s a pro tip: test out your temperature and technique on a scrap piece before committing to your final design. A little patience goes a long way in preventing those “oh no” moments!
Adding Depth and Creativity to Your Designs
Layering Techniques for Texture
Want to add depth and realism to your designs? Layering is your best friend! Instead of trying to burn dark lines in one go, build up the texture slowly with multiple light burns. This technique helps you control the shading and creates a more natural look. Think of it like sketching with a pencil—soft strokes build up to form a rich, detailed image. Using a wood burning tool with adjustable temperature settings makes layering even easier, as you can start with a light burn and gradually darken it. Experiment with different tips for unique effects. A rounded tip is great for smooth shading, while a fine-point tip can add crisp details. Don’t rush the process; layering takes time, but the results are totally worth it!
Combining Wood Burning with Other Art Forms
Why stop at just wood burning? You can take your projects to the next level by mixing in other art techniques! Try adding some watercolor or acrylic paint to highlight certain areas of your design. The contrast between the burned wood and the bright colors can make your artwork pop. If you love carving, you can combine pyrography with wood carving to create unique 3D effects. Another fun idea is to use resin to seal and add a glossy finish to your burned designs. Some artists even mix pyrography with calligraphy, using a wood burning tool to burn fancy lettering into signs or plaques. The possibilities are endless, so don’t be afraid to experiment and make your projects one-of-a-kind!
Finishing Touches: Sealing and Protecting Your Work
Choosing the Right Sealant
Once you’ve poured your time and effort into creating a wood-burned masterpiece, the last thing you want is for it to fade or get damaged. That’s where sealant comes in! A good sealant protects your design from moisture, dust, and fading over time. If you want a natural finish that keeps the wood’s original look, opt for a matte or satin polyurethane. If you prefer a polished, glossy effect, a high-gloss sealant will give your piece that extra shine. Spray sealants are super convenient and dry evenly, while brush-on sealants offer a thicker protective layer. Whichever one you choose, make sure to apply it in thin, even layers and let each coat dry fully before adding another. Sealing your work ensures that your woodworking burning creations stay beautiful for years to come!
Maintaining Your Wood Burned Artwork
A little care goes a long way in keeping your wood-burned pieces looking fresh. Since wood is a natural material, it can absorb moisture and collect dust, which may dull your design over time. To keep your artwork in top shape, store it in a dry place away from direct sunlight, as UV rays can cause fading. If your piece gathers dust, gently wipe it down with a soft cloth—avoid using water unless your work is properly sealed. A quick touch-up with a woodworking burning kit can also bring back lost details if your design starts looking faded. If your artwork is something you handle often, like a personalized cutting board, reapplying a sealant every few months can keep it protected. Taking these simple steps will help your creations stand the test of time!
Common Mistakes and How to Avoid Them
Uneven Burns and Scorch Marks
If your burn marks look more like accidental scorch marks than an intentional design, don’t panic—it’s a common issue, and there’s an easy fix. Uneven burns usually happen when the heat isn’t properly controlled or when the tool is held at an awkward angle. Try to keep the tool moving at a steady pace and avoid pressing too hard in one spot. If you notice an area that’s burned too deep, you can lightly sand it down to even things out. Another trick? Use a shading tip to blend the area, making it look more intentional. Practicing on scrap wood can help you get the feel of your woodworking burning tool before tackling your final piece. With a little patience, you’ll master the technique and create smooth, even designs!
Handling Overheating Issues
Ever noticed your wood burning tool getting too hot to handle? Overheating can be a real problem, especially if you’re working on a long project. Many woodworking burning tools come with adjustable heat settings, so lowering the temperature can help. If your tool doesn’t have a dial, take short breaks to let it cool down. A cooling stand is also a great investment, allowing you to rest the tool safely between strokes. If you feel the heat building up too much, unplug it for a few minutes to prevent damage to the internal components. Overheating not only makes the tool uncomfortable to hold but can also cause excessive scorching on your project. Managing heat properly will keep both you and your artwork safe!
Creative Project Ideas to Try
Looking for inspiration? There are endless ways to use a woodworking burning kit beyond just simple designs.
- Try making personalized coasters with intricate patterns or initials for a custom touch.
- Wooden spoons with burned floral designs make beautiful kitchen gifts.
- If you’re into home décor, create a rustic wooden sign with your favorite quote.
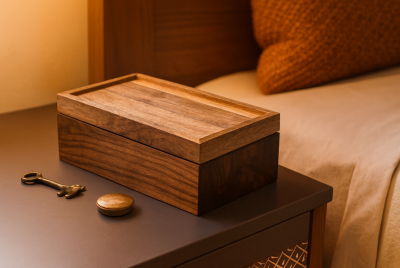
- You can even burn portraits or landscapes onto wooden plaques for a stunning piece of wall art.
- For a fun seasonal project, decorate wooden ornaments for holidays.
Once you start exploring, you’ll see that wood burning is a craft with limitless possibilities!
Maintaining Your Wood Burning Kit
Cleaning and Storing Your Wood Burning Tool
Taking care of your tools ensures they last a long time. After each project, let your wood burning tool cool completely before cleaning. Use a soft cloth to wipe off any residue, and if there’s stubborn buildup, gently scrape it off with fine sandpaper. Store your tool in a heat-resistant case or a dedicated box to prevent damage. Keeping your woodworking burning kit in good condition means it’ll always be ready for your next creative idea!
Replacing Tips and Other Accessories
Just like paintbrushes, wood burning tips wear out over time. If you notice uneven burns or difficulty making smooth lines, it might be time to replace the tip. Most woodworking burning kits come with multiple tips, so swapping them out is easy. Always wait for the tool to cool completely before changing tips to avoid burns. Keeping extra accessories on hand ensures you never have to pause a project when inspiration strikes!
Conclusion: Wrapping Up Your Pyrography Journey
By now, you should feel confident enough to grab your woodworking burning kit and start creating something amazing! Wood burning is a craft that blends creativity with patience, and every project helps you improve. Whether you’re making gifts, home décor, or just having fun, the possibilities are endless. Don’t be afraid to experiment and make mistakes—its all part of the process. Now, go fire up that tool and let your imagination burn bright!
FAQs
- What’s the best wood for beginners to use?
Basswood is a great option due to its smooth, soft surface. - How do I prevent burns and injuries?
Always work in a ventilated space, wear gloves, and handle your tool with care. - Can I use my wood burning tool on other materials?
Yes! Leather and cork are great alternatives for pyrography. - What’s the best way to transfer designs onto wood?
Use transfer paper or print your design and trace it onto the wood. - How do I fix mistakes in my wood burning project?
Lightly sand the mistake and reburn the area to blend it in.